Thursday, 29 November 2012

News.....It's been a while.....


MJ Crafts has been busy getting ready for Christmas, I have had many Sold outs and I'm waiting for new arrivals. The Splodge Mat has proved very popular and as have the stencils.
 
I am now stocking a larger range of goodies to tempt you everything from felt squares, toy eyes, and air dry clay to a wider range of X-cut products and a craft range for children.
 
 
I also have started to stock more magazines, compendiums and project books to give you all inspiration.


The new Hougie Junior is now in Stock as is the wedding project book.


Kanban Stamps have been very popular and I will be introducing the Kanban Wedding range in the new year.


The Hunkydory Range is as good as ever and and I add new stock on a monthly basis.


Well that's it for now ..... hopefully I will be able to post another blog soon


Crafty Blogs

Thursday, 25 October 2012

My Halloween Pumpkin

My Halloween Pumpkin


Well I can't take credit for this amazing pumpkin, my brother-in-law carved it for me to put in the window display at the shop. He's going to do another Two ready for Monday, so I'll be adding more photo's soon, can't wait to see his designs.

Back Soon.............................


Crafty Blogs

Tuesday, 23 October 2012

Snowflakes

It's all about Snowflakes for Me!!

 
I just love using snowflakes in my winter projects, here's a Twisted Easel card I made this week using the Splodge Away snowflake mask, distress inks and a Gorjuss Cling Stamp (Winter Friend)
 
 
You can never have enough snowflakes, I've added some metalic snowflakes made using a Tonic Studio punch
 
 
Thanks for looking, follow me on Facebook for news and updates www.facebook/mjcraftsupplies


Crafty Blogs

Thursday, 18 October 2012

Boxes For Christmas

Boxes For Christmas

 So I've been busy this week making gift boxes for samples and my head is already full of ideas of how to adapt them

 
I Like the square box the best and I have used this lovely card from Kanban, it scores really nicely, using the Hougie Board of course!!!!!
 
The triangle boxes are so easy to do and the best way to make batch boxes quickly (would be really good for wedding favours)
 
I run a class in box making and we made both of these in 1 1/2 hours, it costs £10 and includes all materials, the next class is on the 17th November, 10am until 11:30 am.
 
Call 01452 415440 to book your Place


Crafty Blogs

Wednesday, 10 October 2012

Hunkydory Snow Globe Instructions

Hunkydory Snow Globe Instructions

 
Lots of you have asked me for instructions for this snow globe kit from Hunkydory, please note the kit contains enough to make 4 snow globes and 4 boxes to post them in. The kit does not include the snowfall acetate or the swirl background card I used to decorate the box.
 
To start pop out the 4 layers of decoupage (as below) you can layer them with foam pads at this point
 
 
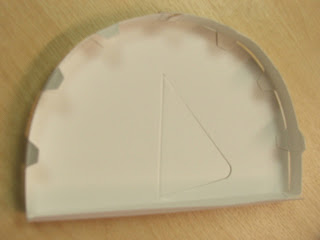
 You will have a printed image inside the frame below, pop it out and save to decorated the box at the end. Bend the tabs on the card pieces upwards.
 
I used 3mm red tape to stick the tabs as below
 
Now add the second strip of card to create a frame around the card edge
 
 
Add the layered image in the centre, note the image is smaller than the semi circle just try and centre it as best you can, the frame will allow for any error in placement.
 
Sorry the next image is upside down, its just to show the layers of the image

I've added snowfall acetate to the frame, again fixing with red tape and then cutting off the excess


Add red tape to the long tab at the base of the card and on the small tabs

I made sure to stick the frame level with the bottom (below)


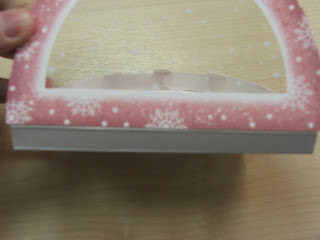
And there's your finished globe!!!!!! Oh I added one of the embellishments from the kit in the bottom corner.
 
The box is pretty simple, fold all your score lines and add red tape to the small tabs in each corner
 

I've used the insert as mentioned in step 1 to decorate the box, and added some snowflake embellishments from the kit, Oh and the swirl background card (not in the kit)
 
 
Hope these instructions helped you to create beautiful globes!!!!!!!!!!


Crafty Blogs

Monday, 1 October 2012

MY Smash Book

My SMASH BOOK


So I've made a start on my Smash book by K & Company, here are a few pictures, I hope they give you a bit of inspiration. There are no rules to using a Smash Book, just add the things you like, photo's, tickets, postcards, feather's just to name a few.


I like to cut up postcards (new ones) leaflets maps etc as a way of journaling


I've used my Spellbinder's label dies to cut out some of my photo's


Crafty Blogs

Holly the lot, Spoldge Mask

Holly the Lot, Splodge Mask

 
I just love this mask, I was amazed at just how well it embossed through my Grand Calibur (I'm normally a Big Shot girl, but had to revert as these masks are too big, in a good way!)
 
Top tip: these masks give a really deep impression so I used some greaseproof paper when I put it through the machine to stop the tan mat sticking.

I found the Centura Pearl Card and Clarity Coated/silk card gave the best results (some of the cheaper/uncoated card stock cracked!)
 
 
For this card I used Silver Foil card stock by Bazzill Basics and embossed it using the Holly the lot mask. I used Clarity coated/silk card and also embossed the mask. I got to work loading up my Splodge mat with Distress ink (pine needles) and used my brayer to add the colour.
 
Top Tip: I found the brayer gave me this effect by leaving a white edge around the holly giving more of a dimensional effect, the ranger blending tool gives great coverage but you loose the white edging!

 
The card has been edged using my blending tool with Distress ink (fired brick). I have punched small holes around the scallop card with a mini hand punch and coloured in the berries on the foil background with a promarker (berry red)

 
I have added more dimension by braying another piece of card and cutting out some of the holly leaves, adding a foam pad for depth. To finish with a bit of sparkle I've used a 2 way glue pen to add detail to the leaves and added some ultra fine glitter. The ribbon is by Brenda Pinnock, and some sparkly peel offs are made by Starform.


Crafty Blogs

Tuesday, 25 September 2012

Splodge Away Mat Review

 
So I've been using the 8x8 Splodge away mat for about a week now I've used it with my brayer (which was still in the box as I couldn't get on with it before), and with my blending tool. I like the fact the Splodge mat is white so you can see the true colour of the inks and it really smooth for brayering.
 
I used my distress inks and stamped colour over the mat, the colour blended perfectly with my brayer and blending tool. I found this especially useful as I could tone down some of my brighter inks. 

I've also used 2 different colour distress inks (fire brick red and antique linen) light on one side dark on the other and used the brayer to create a 2 toned background, pictured below,  the stamp is designed by Sue Dix from Personal Impressions.


I have also used my mica misting sprays on the mat to get different effects and they clean off really easily.
 
As far as cleaning was concerned it was a breeze, just spritz with water and wipe dry. Oh and don't panic (I did) if you get archival ink on your mat, it will come off, just used a stamp cleaner (I used the one made by Ranger)

So to conclude the Splodge Mat does everything it claims, its a great product that is essential to any crafter.

Please Comment to tell me what you like about the Splodge Mat.......................


Crafty Blogs

Thursday, 13 September 2012


MJ Crafts stocks - Smash by K & Company
 
Check out the video below to see just how easy it is the journal your memories
 
 
facebook.com/mjcraftsupplies


Crafty Blogs

WI Demonstration

Hi Everyone,

Well I was kindly invited to attend a WI meeting this week and do some demonstrating (christmas themed). This was my first WI meeting and it was a bit of a panic when I arrived and I realised this was a rather large group. I had nothing to fear the ladies were all lovely.

I decided to use the Hunkydory christmas range to make a selection of cards, as pictured below.


I used the snowfall acetate, and elements from the Hunkydory Christmas Classic bumper pack.
 
I also made these cards from the same pack


Crafty Blogs

Saturday, 8 September 2012

Splodge away

MJ Crafts stock
Splodge Away products


I will running a workshop on Saturday 6th October, 10am until 11:30am and Wednesday 24th October 10am until 11:30am teaching you techniques and ideas of how to use these fab products, post me if you are interested (Or ring the shop on 01452 415440)


Crafty Blogs

Thursday, 6 September 2012

Mini Album Workshop

Mini Album Class

We will be holding a mini album workshop on Monday 1st October 2012,
10am until 11:30am,  to include all materials.


All materials and equipment will be provided, booking/payment in advance is required and is non-refundable.

MJ Crafts, 15 St Aldate Street, Gloucester, GL1 1RP. Tel: 01452 415440

Crafty Blogs